Today is January 2nd, 2011. What that means is that it’s the day I remove all traces of Christmas 2010 from the Jones residence. Taking down all of the festive holiday stuff, paired with the fact that all of the excitement of the season is now a memory sort of makes me sad. It happens every year, and though I’m happy to have a living room that has once again seemingly doubled in size, it also makes me long for just a touch more comfort food.
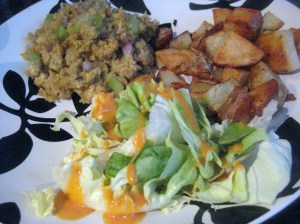
Today I decided to try some vegan cornbread stuffing, some crunchy roasted potatoes with garlic, and a nice salad to round it all out.
I started with the roasted potatoes.
Crunchy Roasted Potatoes with Garlic
2 large baking potatoes
olive oil
Salt, pepper and cayenne pepper
6 cloves of garlic
Preheat oven to 375.
Wash and scrub two large baking potatoes and cut into cubes. Toss them with olive oil and lay them in a single layer on a non-stick baking sheet. Sprinkle with sea salt, fresh ground pepper and cayenne pepper (to taste).
Bake for 30 minutes.
Remove from oven, sprinkle with a bit more olive oil, and add approximately 6 medium to large cloves of garlic, sliced into smallish pieces.
Use spatula to turn potatoes to brown on other sides. Add garlic to baking sheet and return to oven for additional 20 minutes or so.
The result should be some nicely browned, crispy potatoes and some delicious roasted garlic. Mmmm…
________________________________________________
Vegan Cornbread Stuffing
1 bag Pepperidge Farm cornbread stuffing
1 T. vegan margarine (Earth Balance)
1 T. olive oil
1 small red onion
1 c. chopped celery
2 c. vegetable stock
3/4 T. poultry seasoning
salt & pepper
In medium to large skillet, melt vegan margarine with 1 T. olive oil. Add poultry seasoning, celery and onion and saute until softened.
In casserole dish, put cornbread stuffing mix, celery and onion mixture and 2 c. vegetable stock. Stir to combine and moisten all of the stuffing mix.
Bake at 350 for 20 to 25 minutes.
Filed under: Main Dishes
The temps are unseasonably cold here in Minneapolis for this time of year, which reminded me of how much I like some fantastically spicy chili on a brisk day to warm me up a bit.
D.Jones and I both agree that Fitger’s Vegetarian Chili in Duluth is the best vegetarian chili we’ve ever had, and as luck would have it, the recipe has been posted on Mpls-St. Paul Magazine’s website for years. We’ve made it numerous times, though most often on a weekend when we have a little more time to dedicate to the chopping, which we always seem to do by hand. It becomes a process, these chili days of ours, and the result is unbelievable and worth every minute of it. If you’d like to try the best vegetarian chili on earth, here’s the recipe for you, as printed on mspmag.com.
Fitgers’ Vegetarian Chili |
|
| Duluth’s popular Fitger’s restaurant fires up a cold North Shore afternoon with this meatless chili, featuring green peppers, Tabasco sauce, and red wine for added flavor. With the likes of black beans, mushrooms, carrots, and onions mingling in the spicy sauce, you won’t miss the ground beef.1/3 c. oil 1 pint onion, finely chopped 3/4 c. celery, chopped 1 c. green pepper, chopped 1 tbs. garlic, minced 1 pint mushrooms, chopped 1 tbs. ground cumin 3/4 t. dried basil 2 tbs. chili powder 3/4 t. dried oregano 1 1/8 t. salt 3/4 t. pepper 1 1/2 lbs. tomatoes, canned 1 1/2 lbs. black beans 3/4 t. Tabasco sauce 1 1/2 oz. tomato paste 1/4 c. red wine 1 c. carrots, chopped Heat oil in a fry pan and add onions, celery, peppers, carrots, garlic, mushrooms and spices. Saute ten minutes, add remaining ingredients, (reserving juice from black beans and tomatoes) and bring to a boil, stirring constantly. Reduce heat and simmer for 30 minutes, adding juice from black beans and tomatoes. Serves 8. |
Now tonight I didn’t have quite as much time to prepare, as I have a 3 1/2 year old who loves to do things like scale furniture, terrorize cats, and chase the dogs with baseball bats when I spend too much time in the kitchen. Instead, I made a speedy version of vegetarian chili, which actually turned out quite nicely. Not, I will readily admit, as nicely as Fitger’s, but it made for a pretty good dinner without too much prep time.
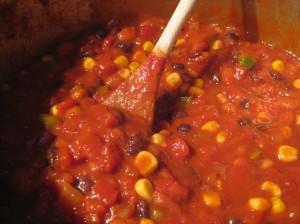
Fast & Easy Veggie Chili
1 green bell pepper, diced
1 small red onion, diced
3 cloves garlic, minced or put through press
1 c. frozen or fresh corn
1 28 oz can finely diced tomatoes
1 6 oz can tomato paste
1/2 c. water
1 can black beans
1 can navy beans
2 T. chili powder
2 tsp. ground red pepper (cayenne)
1 tsp. cumin
2 T. olive oil
Salt and Pepper to taste
_________________________________
Lightly coat bottom of large sauce pan or stock pot with olive oil. Over med-low heat, saute diced onion and green pepper until fragrant and beginning to soften. Add garlic and continue to cook for another minute or two. Add diced tomatoes and tomato paste, and corn, along with black beans and navy beans, rinsed, and 1/2 c. water. Stir well to combine, and then add cumin, red pepper, chili powder, salt and pepper. Stir again to combine and then cover pot, and allow to simmer for 15 minutes to 1/2 hour.
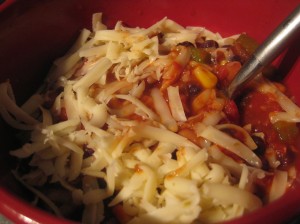
I served ours with a generous amount of shredded Vermont cheddar and some tortilla chips, which together were the perfect complements.
Cooler weather arriving, and a bizarre taste in food that can only be blamed on the March addition to our family has had me craving rich, homestyle meals.
This evening I decided to whip up some good old biscuits and gravy. I gotta say, for a first attempt at both, it went pretty well. Okay, okay, I realize that it doesn’t get much easier than baking powder biscuits, but cut a girl some slack. Especially a girl who is on a roller coaster of exhaustion, nausea, grumpiness and hunger.
Baking Powder Biscuits
2 c. flour
3 T. baking powder
1/2 tsp. salt
1/4 c. shortening (I used vegan shortening, but any can be used)
2/3 c. milk
Preheat oven to 375 degrees. Using a fork, mix together flour, baking powder, and salt. Use same fork (or pastry cutter) to cut in the shortening. Add milk and mix in just until mixed. Drop by rounded tablespoon (or slightly larger) onto greased baking sheet. Bake about 20 minutes or until beginning to lightly brown. Remove from oven and set aside.
_________________________________________
Vegetarian Gravy
1 can of cream of mushroom soup
1 small yellow onion, finely diced
1/4 c. butter or margarine
2 1/2 c. vegetable broth
2 T. soy sauce
1/4 c. flour
1/2 T. sage
1/2 T. thyme
freshly ground black pepper to taste
In large skillet, saute diced onion in butter over med-low heat until onion starts to soften. Add vegetable stock, 1/2 the can of mushroom soup, and soy sauce. Slowly add in flour one tablespoon at a time, whisking with a fork the entire time to prevent lumps. Bring to a boil and then reduce heat to low again, adding sage, thyme and black pepper. Allow to cook for remaining 10 minutes or so, stirring periodically and allowing gravy to start to thicken.
_________________________________________
The finished product, served with some vegetarian bacon and some wedges of a fabulous cara cara orange…one of my new favorite fruits. Delish~

Filed under: Main Dishes
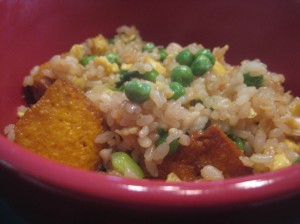
My friend Jae and I have some pretty similar taste in food, and when I talked to her the other night and she mentioned that she’d just made tumeric and salt fried chicken and some fried rice, my mouth was watering and I was ready to head for the store. She reminded me that I don’t really eat meat, and believe me, at that moment, I needed reminding. I did tell her, however, that since I am nauseated most of the time, I have been eating whatever sounds appealing and I fully intended to attempt to make her recipe, that she kindly listed on her awesome food blog here….
Until I went to the store and started perusing chickens, that is. I couldn’t do it. So, instead, I bought some extra firm tofu and decided I’d give her recipe the old college try anyway, with some minor subsitutions.
I pretty much followed her chicken recipe to the “t”, but with the extra firm tofu. Then I started on the Thai fried rice recipe she’d listed and realized the tomato I’d purchased spcifically for this dinner had seen it’s better days by the time I actually got around to making the dish. So, out it went and I instead subbed what I had, which were peas. So be it. I also had 2 bunches of green onions and no regular onions, so I used all of them. Turned out just fine and as I was cooking up my rice in the final steps, I threw in my cooked tumeric and salt tofu.
It was very, very good. Catch her original recipes as listed above, or give it a shot with tofu…either way it’s delish and my husband has already declared that I can make the fried rice as often as I’d like…
Filed under: Main Dishes
I’m going to begin by telling a story I shouldn’t. At least, not if I want to retain any semblence of pride and/or dignity, but I’m going to anyway.
When I first met D.Jones, I knew how to cook a little. Okay, mac & cheese was about the extent of it. And frozen pizzas. Oh, and veggie burgers. The latter of which, I never wanted to actually dirty a pan for, so I made them in my toaster. Gross with a capital G. I’m surprised I never got food poisoning.
I’m sure all of the above was because my mom is an absolutely fantastic cook, who also enjoys feeding the masses, so if the longing for a home-cooked meal would strike, I needed only drive the short distance to my parent’s house, or make a call and food would miraculously appear at my doorstep.
I wanted D.Jones to think I knew what I was doing, though, so one day I decided I would make my mom’s stuffed shells recipe. After numerous attempts and some major frustration, I ended up sitting on top of my kitchen counter crying into a cheap bottle of chardonnay, ready to throw in the towel. I made a last phone call to my mom to try to pin point what was going so drastically wrong and she said something to the effect of “Kristin, this is a pretty easy recipe. Did you get the mixture in to the shells?” And I replied “No!! That’s part of the problem! They keep breaking!” There was a pause from her end of the extension and then she said “Umm…you cooked them, right?”
Huh. Never saw that part in the directions….
I am happy to say that I’ve sinced figured out that to stuff shells, one must cook the pasta first, so my skills have improved significantly, no? In fact, I’m so adept at stuffing pasta shells, that I made up my own vegetarian version of my mom’s recipe. It’s so easy that I think I could have mastered this one on the first try, even so many years ago….
Easiest Stuffed Shells
20-22 pasta shells, cooked and drained!
1 small glass jar of Pace Picante sauce
1 can of tomato sauce
1/2 T. olive oil
1 bag of Boca or Morningstar meat crumbles (or whatever brand you like. For this recipe, I prefer the morningstar sausage crumbles)
1/2 med. onion, diced
1 small cannister of french fried onions
1/4 to 1/2 frozen bag of corn
1 bag of pre-shredded Mexican cheese (2 c. I think?)
1 ripe avocado, diced (optional)
______________________________________
In a skillet, heat the olive oil and the onion. When the onion begins to soften, add the corn and heat through. Then dump in the meatless crumbles. (of course, you could make this with hamburger or ground turkey if you prefer…just obviously cook it ahead of time and then re-add it at this point) Stir to combine and heat through. Then, stir in a large handful of the french fried onions and a large handful of the shredded cheese and remove from heat.
Meanwhile, in medium bowl, mix the picante sauce and the tomato sauce, stirring together.
Use a measuring cup to remove about a cup to a cup and 1/2 of the sauce and add it to the meat/corn/onion mixture. Stir together until blended.
Scoop enough of the remaining sauce into a glass 9X13 baking dish to just cover the bottom with a small amount.
Begin stuffing the cooked pasta shells with the meat/corn/onion mixture and then laying them in the bottom of the baking dish. My 9X13 dish holds exactly 20 nicely stuffed shells, which should use all of your mixture.
Once they are all in the dish, ladle the remaining sauce all over the top and then cover with cheese, and then the remaining french fried onions.
Bake at 350 degrees, covered, for about 30 minutes. Remove cover (I just use a sheet of tinfoil) and bake a few more minutes until the cheese is nicely browned and yummy looking.
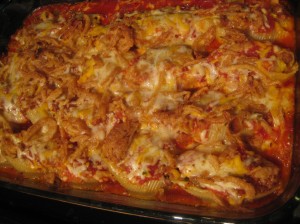
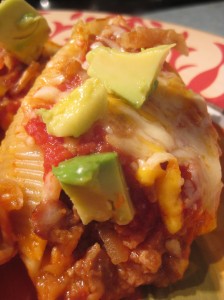
I serve mine with the diced avocado on top, which is fantastic! I love this dish because the leftovers are just as delicious as the first night you make it…
Filed under: Main Dishes
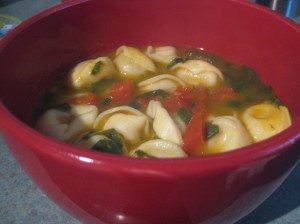
Last week we had a stretch of a few days that had highs around 70 and lows in the 50s. Not cold, by any stretch, but a cool reminder that fall is on it’s way. It made me long for a nice, hearty soup dinner, but honestly, my usual energy level is missing in action lately. A quick Google search brought me to this recipe, so with a few slight modifications and not much time, I had a that delicious, warming soup dinner that I wanted.
Easy Tortellini Soup
2 T. olive oil
3 to 4 cloves of garlic, diced or put through press
6 c. vegetable stock (or so…doesn’t need to be exact. I used about 1 1/2 boxes of pre-bought organic stock)
9 oz. pkg refrigerated Buitoni 3-cheese tortellini (or the equivalent in any brand of frozen or refrigerated tortellini)
1 1/2 lbs. tomatoes, chopped
5 to 6 oz. baby spinach leaves (I used about a 1/2 bag of prewashed leaves, which I simply rolled in bunches and sliced thin in a chiffonade. You could also tear it or chop it…just make sure it’s washed and stemmed)
10 basil leaves (again, I prefer to chiffonade, but you can tear or chop if you prefer)
fresh cracked pepper
fresh parmesan for shredding on top
_____________________________
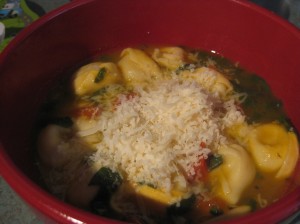
Add oil to stock pot or large saucepan on med heat. Add garlic and saute until beginning to brown. Pour in vegetable stock and tomatoes and bring to a boil. Stir in tortellini and cook until tender (or according to pkg instructions), it should only be a few minutes if refrigerated. Add spinach, basil and fresh ground black pepper. Reduce heat and simmer for a few minutes. Then ladle into bowls and top with freshly grated parmesan cheese.
So easy and so delicious!
For a wedding gift from my brother-in-law Keith, we received a very nice pizza stone and an awesome pizza cutter. The second we opened it I exclaimed to D.Jones “Oh, how perfect is this!? We’ll use this all the time!” That was in May of 2005. Yesterday, which of course, would be August of 2009, I decided to try it. The stone, that is. The pizza cutter has actually gotten a lot of use.
I looked up easy pizza crust recipes and decided to do some slight modifications to the Smitten Kitchen’s “Really Simple Pizza Dough“. I shouldn’t have. Well, modified it that is. I have no doubt that the pizza crust would have turned out perfectly had I followed the recipe as intended.
Who knows why I thought I would be some sort of expert at pizza crust making when it’s never even occurred to me to do so until moments prior to dumping some white whole wheat flour in my mixing bowl, but I did. The result was a dough that was way too wet, so I started adding in more flour until I thought it was a good consistency.
I read that the pizza stone should be fully heated and the dough should be laid upon the pizza stone as it’s hot to achieve a perfectly crispy crust, so I heated up my stone as my dough was rising and I thought everything was good-to-go.
Now, stretching and rolling out pizza dough was more difficult than I imagined it would be, so I was getting frustrated, which helped nothing. I ended up tearing the dough on more than one occasion and had little Cooper Jones been within earshot, he’d have some choice new vocabulary on his hands…just in time for preschool to start on Wednesday.
I sprinkled some corn meal on my pizza stone as someone else had recommended on another blog, and then finally was able to get my dough onto the stone. It even looked reasonably okay.
On went the toppings, which I decided to keep basic for my first attempt. Shredded mozzarella, sliced green olives and sliced red onions, with some homemade sauce, which I made out of tomato sauce, tomato paste, Italian seasoning, 3 garlic cloves and some fresh ground pepper and some red pepper flakes. All to taste, really. I measured nothing, and the sauce, I must say, turned out wonderfully! I’ll include it in an actual recipe in the future, when I make attempt #2, which will be soon.
Here’s how it looked going in to the oven….

And the finished product…

Not bad looking, but it had some issues. First, the crust was too soggy for me in some places, and the thicker parts of the edge were way too doughy. Ick. The other problem was that much of the crust stuck to the actual stone, which was frustrating and made clean up hellish. The flavor was pretty good, but it seemed to be lacking something. Not sure what…
It’s a good sign that my husband took the leftovers to work today anyway, so I guess it was okay, but not what I had hoped for.
It is kind of fun, though, and so satisfying to see it baking away in the oven. I’m gearing up for my second attempt and will keep you posted. If I feel it’s more successful, next time you’ll actually get recipes. Until then, I’m proud that I finally gave it a go, and that pizza stone is finally going to get some much deserved attention.
Taking a hiatus from tomatoes, I decided to make breakfast for dinner tonight and begin my end-of-summer segue to Autumn. Oh, I love Autumn. I absolutely cannot wait for the apple orchards to open, for the crisp early morning and evening air of fall, for the smell of fireplaces and the sounds of leaves crunching underfoot. I know so many people who say they love fall, but have you ever heard someone say they don’t? I mean, people say “oh, I don’t like summer. It’s too hot/humid”, whatever, but Autumn?! Never heard of it.
Oops. I perhaps got carried away with my love of fall, so what I was getting at were the flavors of apples and cinnamon. I’ve seen tons of recipes online for Dutch apple pancakes, but I’ve never honestly had one, and I’ve definitely never tried to make one, but I had three lovely Pink Lady apples calling out to me, and I thought “why not”?
I didn’t follow a recipe, but instead kind of took what I’ve read on other recipes and made up my own version. A traditional Dutch Apple Pancake is apparently made in a cast iron skillet, of which, I own none. They are also sometimes sprinkled with powdered sugar, of which I also have none. So, without further adieu, here is my take on a Dutch Apple Pancake, sans skillet.
If you haven’t had one…I can assure you…you must. Absolutely must.
Kristin’s non-traditional Dutch Apple Pancake
3 medium apples of your choice, cored, peeled and sliced
2 T. butter, plus approximately 1 more T. or so for buttering your dish
3/4 c. milk (I used 1%. Use what you like)
3/4 c. flour
5 eggs
3 T. sugar
1 tsp. vanilla
1 T. brown sugar
1/2 tsp cinnamon
_____________________________
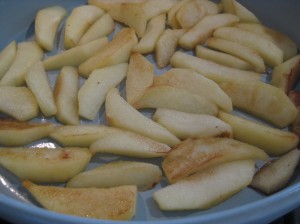
Using medium sized skillet, melt 2 T. butter and add apple slices, cooking them on low to med. until they soften and begin to brown.
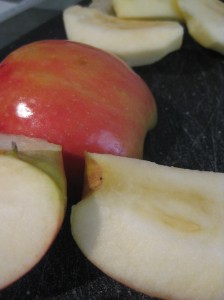
While apples are cooking, preheat oven to 450 degrees. Use remaining 1 T. of butter (or slightly more) to thoroughly butter your baking dish. I used a round baking dish that is 11″ around and about 2 1/2″ deep. If you having something of a similar size but square or whatever, I wouldn’t worry. It should work just fine.
Once apples are softened but still have good texture to them, add them in a single layer to your buttered baking dish.
Next, sprinkle lightly with brown sugar and cinnamon…
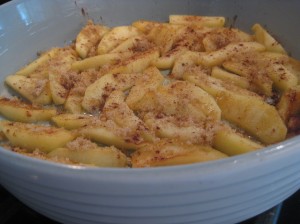
Let them hang out while you make the batter. So, in a medium mixing bowl, add eggs, milk, flour, sugar, and vanilla. Beat with a hand mixer until well blended. (Or use a blender if you prefer). Pour mixture over eggs, and bake until the top puffs up and is starting to get brown. Make sure the middle feels solid through, and you’re good to go~
This simple process will turn into the most light and airy, sweet, but not too sweet, apple-eggy goodness that you can ever imagine. I simply sliced mine right up with a pizza cutter, which worked pretty well.
D.Jones topped his with pure maple sugar, but I didn’t think it needed anything but it’s own simple goodness. Served with a veggie sausage patty and some grapes, it made a perfect breakfast for dinner. And I’m telling you, your house will never have smelled so good! When D.Jones walked in the door from work he said “are you baking a pie?” When I replied “No, that’s our dinner” he looked at me like I was crazy. When he took his first bite of this delicious little slice of heaven on earth, he said “Mmm…wow.” I think that says it all, and the verdict is still out on who gets the leftovers for tomorrow.


This morning, Cooper, D.Jones and I walked to a local farmer’s market. I have been trying to talk D.Jones into joining a local CSA (Community Supported Agriculture) where you pay a fee beginning in February and throughout the growing season, you pick up a weekly 3/4 bushel box from a neighborhood drop site and enjoy locally grown, seasonal produce.
He thinks I wouldn’t use it all and we would feel awful for wasting any of it. I’m trying to convince him otherwise.
So, when we went to the farmer’s market today, we picked up some gorgeous beets and I promptly went home and began looking up recipes with which to use them.
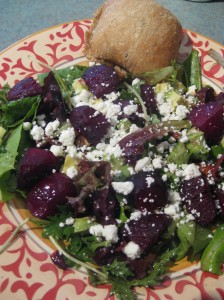
I found this recipe from Giada de Laurentiis and made a few minor modifications to come up with this….
Beet and Goat Cheese Salad
1/4 c. balsamic vinegar
2 large shallots, thinly sliced
1 T. honey
1/4 c. olive oil
salt and pepper
4 to 5 med to large beets, cooked and peeled and cut into bit sized cubes
4 c. mixed salad greens
1 handful walnuts and 1 handful almonds, toasted
1 oz. craisins (I used an individual snack pack)
1 ripe avocado, cut into bite sized cubes
crumbed goat cheese
___________________________________________
Preheat oven to 450 degrees. Line baking sheet with foil.
Whisk vinegar, honey and shallots in bowl. Slowly add olive oil while whisking.
Place cubed beets in bowl and drizzle with just enough of the above vinaigrette to toss to coat. Place beets on foil-covered baking sheet and roast for 12 to 15 minutes. The beets will begin to carmelize. Remove from oven and set aside to cool.
Toss mixed salad greens, walnuts, almonds, and craisins with remaining vinaigrette. Season with salt and pepper to taste. Divide salad between 2 to 3 large plates. Place cubed avocado and beets on top of salad and then sprinkle with goat cheese.
Filed under: Main Dishes
Now, this meal idea deserves some credit, and I know I got it off of one of the food blogs that I check out on a regular basis, but of course, now that I need to give someone credit, I can’t, for the life of me, find the original link or recipe! So, if you are that person and you happen upon mine, I apologize. Drop me a line so I can give credit where credit is due!
This has become one of my favorite light summer suppers. It’s fresh and wonderful and filled with the vegetables of the season. (or, whatever you want to add, which is an additional beautiful aspect of this dish!)
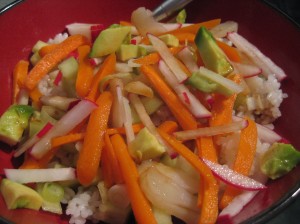
Deconstructed Sushi
Sushi rice or brown rice (1 c. uncooked)
2 to 3 large radishes
1/2 english cucumber
3 to 4 water chestnuts
6 to 8 baby carrots
3 green onions
1 sheet of Nori
1/2 avocado
brown rice vinegar
agave nectar (if you have it and want to use it…it’s not necessary for the dish)
______________________________
Cook the rice according to directions on the package. I usually make this with brown rice, but happened to have sushi rice on hand tonight, so I’ve done it both ways. It makes no difference.
Once rice is cooked, move it to a glass bowl. Add 2 T. brown rice vinegar and about 1/2 tsp agave nectar. Toss with the rice and cool it in the fridge.
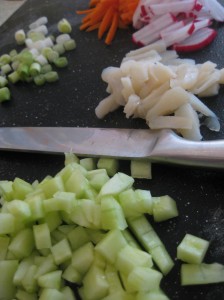
Cut up all of the vegetables in whatever form you like. I usually try to julienne the baby carrots and the radishes, dice the water chestnuts, and cut the cucumber and avocado into small cubes. (for my husband’s bowl, I also usually throw in a handful of raw broccoli because he loves it). Really, use any veggies you like and you’ll be just fine.
Toast your nori sheets over a small flame…the flame of my gas stovetop works perfectly. Once it turns a darker shade of green, it is toasted, which brings out more of the flavor.
You can also add toasted sesame seeds if you like.
Take cooled rice from refrigerator and seperate into serving bowls. Top with veggies of choice, crumble nori over the top, and then shake on some soy sauce and dig in.
Nice and cool on a hot summer evening!
